Using An Event Handler
So far we have just done some drawing. But now, we want to respond interactively to user input. To do this, we need to use an event handler.
The initial window
Lets start by making a window that looks like this:
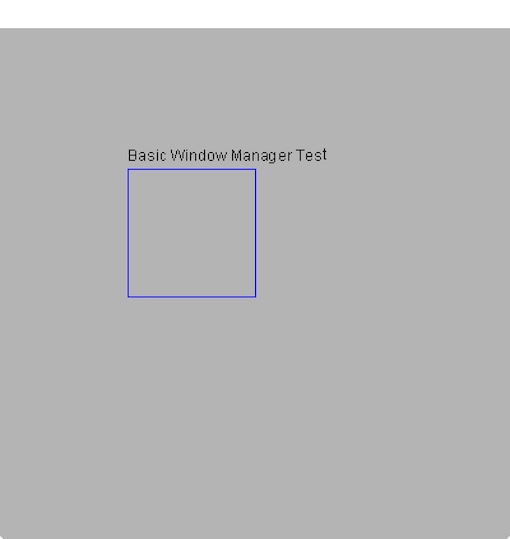
which we do with this code as usual:
include "gui/__init__";
open FlxGui;
FlxGui::init();

var w = create_resizable_window("Felix:gui_04_wm_01",100,100,400,400);
w.add$ mk_drawable FlxGui::clear lightgrey;

var font_name = dflt_sans_serif_font();
var font : font_t = get_font(font_name, 12);
var lineskip = get_lineskip font;

w.add$ mk_drawable FlxGui::write (100,100,font,black,"Basic Event Handler Test");
w.add$ mk_drawable draw_line (RGB(0,0,255), 100,110,200,110);
w.add$ mk_drawable draw_line (RGB(0,0,255), 100,210,200,210);
w.add$ mk_drawable draw_line (RGB(0,0,255), 100,110,100,210);
w.add$ mk_drawable draw_line (RGB(0,0,255), 200,110,200,210);

w.update();
w.show();
The event handler
Now, the next thing is we are going to make a chip which can handle events:
chip event_displayer (w:window_t)
  connector pins
    pin inevent : %<event_t
    pin quit: %>int
{
  while true do
   var e = read pins.inevent;
   var s =
      match e with
      | WINDOWEVENT we =>
        we.type.SDL_EventType.str + ": " +
           we.event.SDL_WindowEventID.str +
           " wid=" + we.windowID.str
      | MOUSEMOTION me =>
        me.type.SDL_EventType.str
      | _ => ""
    ;
    var linepos = 100 + 4 * lineskip;
    if s != "" do
      println$ s;
      var r = rect_t (100,linepos - 2*lineskip,300,4*lineskip);
      w.remove "evt";
      w.add$ mk_drawable "evt" 100u32 fill (r, green);
      w.add$ mk_drawable "evt" 100u32 FlxGui::write (100,linepos,font,black,"EVENT: "+ s);
      w.update();
    done
  done
}
We are using a powerful new idiom: fibrated programming. What you see is a special kind of routine called a coroutine. Lets see what it does.
First, the interface tells us that it displays events on window w. Now our chip has a connector named pins, and on that connector, we have two pins named inevent and quit.
The pin inevent is an input pin for data of type event_t whilst the pin quit is an output pin for an int. I can tell the direction of the pin from the channel type: %< is for input, and %> is for output. The type of data the pin handles comes next.
Now lets look at the code. We can see immediately this chip runs in an infinite loop. It starts of by reading an event from the inevent pin.
Next, we analyse the event, to see what it is, using a pattern match. There are two kinds of event we’re interested in: a WINDOWEVENT and a MOUSEMOTION.
For now, the weird code for these events just converts some of the event information into a string s we can display on the window, lets not worry about exactly what it means (you’ll see, when you try it!).
Now the next bit calculates the position inside the box we drew to display the string, then, if the event description s is not the null string, we print the string to standard output.
Now we calculate a bounding rectangle for the string. Its not very accurate!
Now comes the fun bit! The next thing we do is remove all the drawables
from the window tagged with the string "evt". Then we add
two drawables, the first one fills our bounding rectangle with green,
and the second writes some text. Then we update the window.
Now what is that magical 100u32 you ask? The answer is, this is the z coordinate of the drawing operation, which is a 32 bit unsigned integer. When Felix is drawing on a surface, it draws at the smallest z coordinate first. Then it draws at the next smallest, and so on. At any particular z coordinate, it draws in the order you addes the drawable to the list of drawables.
By default, drawing occurs at z=0u32. So why are we specifying a z coorinate?
The answer is: the background of the window was drawn at z=0.
It was not given a tag, so it has the default tag "".
Importantly, we did not remove drawables with that tag, so the
background drawable is still in the drawable list.
The thing is, we want to draw on top of the background, so we have to ensure we draw at a higher z coordinate.
The Mainline
Now, as promised, it is time to install our event handler:
begin
  var qin,qout = mk_ioschannel_pair[int]();
  device windisp = event_displayer w;
  circuit
    connect windisp.inevent, event_source.src
    wire qout to windisp.quit
  endcircuit

  C_hack::ignore(read qin);
  println$ "QUIT EVENT";
end
The begin and end here are important for reasons that will be explained later, for the moment it suffices to know you need to do this to ensure the schannels we create become inaccessible when you click to quit, so that the program actually terminates.
The first thing we do is make a single synchronous channel of type int which has two end points: qin and qout. The first one, quin is a read channel, and the second one, qout is a write channel.
Next, we make a device called windisp by applying our event handler function to the window it is to operate on.
Then we build a circuit by connecting the event handler to an event source, and wiring up the output end of the quit channel to the event handler as well. Our circuit begins running immediately.
Now we wait until the user clicks to close the window,
or presses the quit key. On a Mac, Apple-Q is the quit key.
We use C_hack::ignore because we don’t care what
the quit reason is.
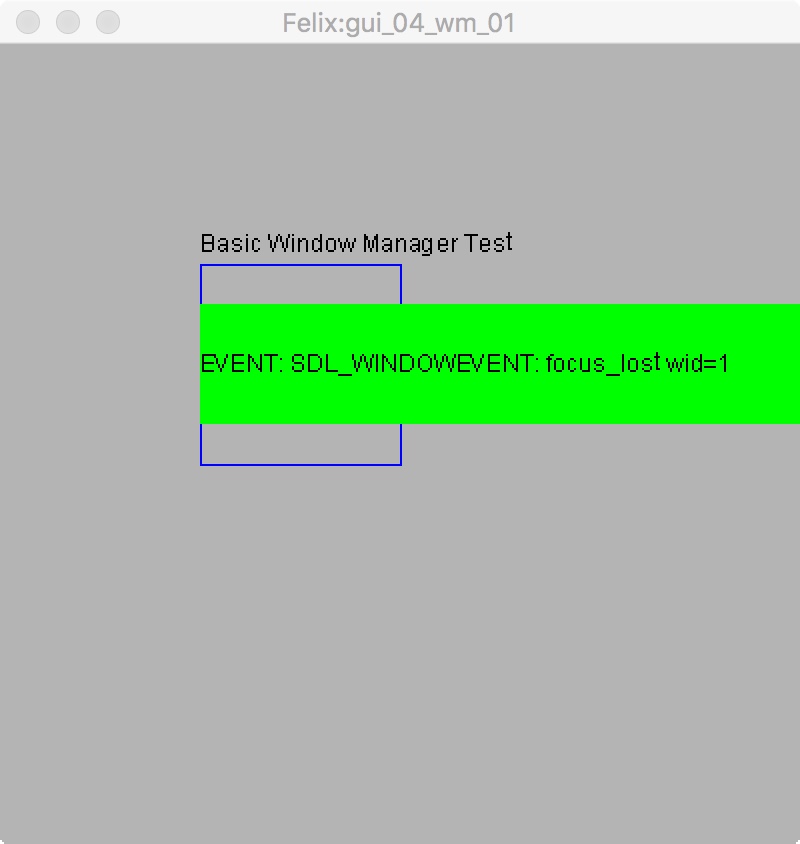
You should see something like this: